

How To Repair A Leaking Sink Drain
Kitchen sinks leak for a variety of reasons and finding the source of the leak is not always easy. The good thing is that fixing a leaking kitchen sink is usually like shooting fish in a barrel and in most cases you don't need to purchase replacement parts.
A leaking kitchen sink is oftentimes acquired past depletion of plumber's putty the under strainer body'southward rim, worn out washers, loose drain connections, faucets leaking under the sink or faulty shut off valves. If yous have a garbage disposal, information technology could likewise be the source of your leak.
If your kitchen sink is leaking from the edges, it is a sign that the caulk which creates a seal between it and the countertop has cracked and is not sealing anymore. To fix this problem you will need to supplant the old caulk with new one.
In order to fix a leaking kitchen sink, you lot will beginning demand to find the source of the leak. The solution will near often involve replacing worn out washers, putting fresh plumber's putty on the restrainer body, replacing faucet cartridges and/or O-rings, or replacing shut off valves. Sometimes all you need to do is tighten a loose connectedness.
How to Find a Leak Underneath the Kitchen Sink
Does your kitchen sink leak just when using the sink or information technology leaks throughout? This is the first step in determining the source of the leak.
If the kitchen sink leaks only when you are using the sink, most probable the trouble is with sink strainer body, often known equally a sink handbasket. A kitchen sink strainer body is the finished part at the bottom of the sink bleed. It links the sink with the drainpipe.
When the sink restrainer is being installed, plumber's putty is usually applied under its rim to create a watertight seal and therefore foreclose leaks. With fourth dimension withal the plumber's putty is eroded and the sink starts to leak from underneath.
The restrainer body is held in identify underneath the kitchen sink using a locknut backed upwards by a rubber washer and a cardboard washer, too known as a friction washer. If the locknut is loose or the washers are worn out, the sink will leak too.
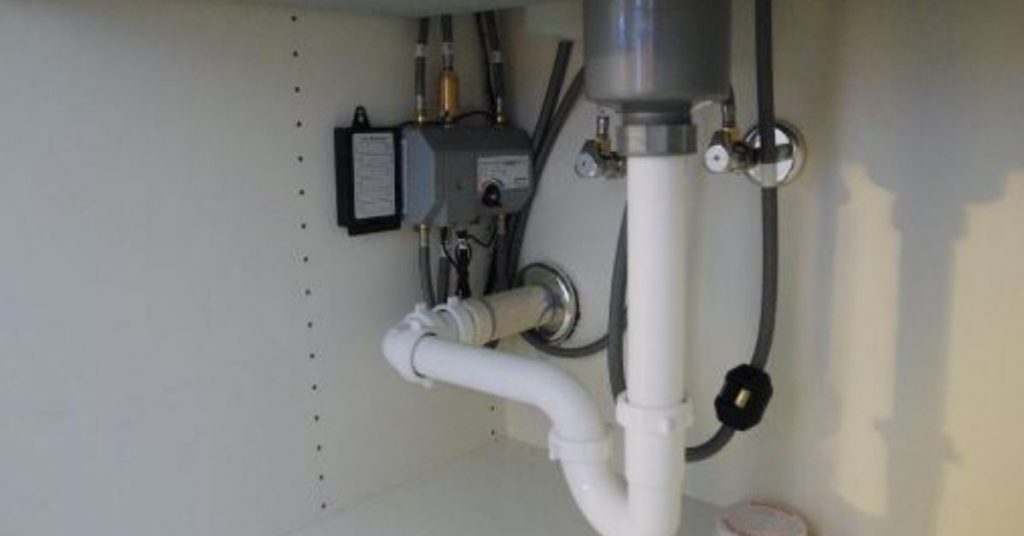
To understand the beefcake of of the kitchen sink drain, let usa look at the image beneath courtesy of Signature Hardware.

While running the sink, water can also leak out from the P-trap. The P-trap is the U-shaped slice of the drainpipe under the kitchen sink.
It holds a little amount of h2o which acts every bit a barrier preventing sewer gases from coming up through your kitchen bleed. P-traps as well trap potential drain clogs preventing them from clogging the drainpipe farther abroad where it would exist harder to unclog.
When h2o is leaking from your kitchen sink P-trap, it is a sign that the connections are loose, the pipes are not properly aligned or the washer is not sealing properly. Aligning and tightening the connections will most of the time fix the problem.
If yous take a dishwasher connected to the drainpipe or garbage disposal, check if the connection is the source of the leak. Outset a dishwasher cycle and check if the leak is coming from its connection to the drainpipe or garbage disposal.
If water is leaking from underneath your kitchen sink all the time, you could be having worn out faucet cartridges or O-rings. When that is the case, the faucets leak from the base of the handle or spout and drip underneath the kitchen sink.
Some other source of leaks underneath your kitchen sink is faulty shut off valves. The packing nuts on the common cold and hot h2o shut off valves could exist loose, or the washers could exist worn out. Tightening the packing nut or replacing the washers is enough to fix the problem.
If y'all accept a double basin kitchen sink and it only leaks when running the garbage disposal, the garbage disposal is surely the cause of the leak. This is usually acquired by a loose sink flange or worn out internal seals. While the loose flange can be stock-still, worn out internal seals is usually a sign of needed replacement.
How to Fix a Leaky Kitchen Sink
At that place are several ways of fixing a leaking kitchen sink depending on what is causing the leak in the kickoff place. In one case you accept already inspected the expanse under the kitchen sink and figured out the source of the leak then fixing it is easy.
Before starting to work on fixing the leak, duck nether the kitchen sink and clear the area. If you use the space to shop stuff become them out in order to get yourself enough room to work freely.
Here are the different methods of fixing a leaking kitchen sink:
1. Tighten Loose Connections

The are many drain connections under your kitchen sink specially if you have a double bowl kitchen sink. A garbage disposal and dishwasher connections as well make the chore even more complex.
- Start with the P-trap connections. If you have a plastic drainpipe, ideally all the connections should be paw tight. Make sure that all the pipes are properly aligned and that the connections are tight. Y'all can apply a wrench to slightly tighten the connections, existence careful non to deform them or strip the threads.
- If the dishwasher connectedness is leaking, catch a screwdriver and tighten the metal clench. Run a short cycle and bank check if the leak has stopped.
- Tighten the strainer torso locknut with a wrench. If it is already tight don't force it. Probably the washers are but worn out, or the plumber'southward putty needs a replacement.
- If the leak is coming from 1 of the 2 close off valves, plow the packing nuts ½ turn clockwise to tighten them. Cheque if the leak has stopped.
For more data on how to set a leaking sink trap check out this post.
2. Replace Kitchen Sink Strainer O-rings and Plumber'due south Putty
Although you lot can buy the O-rings just, it is commonly a amend idea to buy the whole kit which includes the strainer body, O-rings and locknut. A decent replacement kit costs slightly above $10. Plumbers putty is likewise quite inexpensive.

Once you have gathered all the materials together. Its time to become down to work. Hither is how:
- Disconnect the P-trap. Again, recall that the connections are usually hand tight. Only use a wrench when you cannot loosen them with your bare hands. Before disconnecting the P-trap, place a pocket-size saucepan or bowl under it to catch the water and gunk inside information technology.
- Once the P-trap is out of the way, disconnect the tailpiece (vertical pipage connecting P-trap and sink drain) and place it away as well.
- Remove the locknut. Grab a wrench or aqueduct locks and loosen the locknut from the strainer body. Sometimes the locknut is and so tight and corroded, and won't just come off. In that case cut it off with a hacksaw blade. This is why information technology is a expert idea to purchase a complete kit.
- With the locknut out, the strainer body is now free. Push it up and remove information technology from the top of the sink.
- Clean the sink drain opening. Use a putty knife to scrape off old plumber'due south putty from the drain opening also equally from strainer torso. Clean the area with a newspaper towel and brand sure that it is dry out. Water is undesirable if y'all want to accept a nice seal.
- Scoop a generous corporeality of plumber's putty and scroll it between your palms into a pencil-size bead. Make sure that the length of the bead is slightly longer than the circumference of the strainer body.
- Apply the plumber's putty under the rim of the strainer body and cut off the excess amount.
- Push button the strainer body downwardly the sink bleed opening.
- Align the rubber and friction washers on tiptop of the strainer cup (condom washer should be at the tiptop and push them over the strainer trunk's threads underneath the sink.
- Holding the washers and strainer cup upwards with 1 hand, screw in the lock nut with the hand until mitt tight. Grab a wrench or channel locks and tighten the locknut further.
- Cheque the status of the strainer body from above the kitchen sink. As a sign that you have a skilful seal, plumber's putty should squeeze out from all effectually the edges of the strainer body. Trim off the backlog plumber'south putty.
- Connect the tailpiece and the P-trap and tighten the connections.
- Turn on the water to the sink and let it run for about a infinitesimal. Check for leaks under the sink, at the very top where the new strainer sits.
- Plug off the sink drain and permit the sink fill with h2o. Continue monitoring for leaks. Drain the h2o and once again bank check for leaks especially around the P-trap. Tighten the connections a little bit more than if you lot observe whatsoever leaks.
3. Supervene upon the Caulk
This is the solution for a kitchen sink leaking from around the edges. You will notwithstanding need to remove the quondam caulk in order to put in the fresh caulk. Follow the steps below:
- Use a directly-edged blade or pocketknife to cut through the one-time caulk. Position the knife between the countertop and sink and remove as much of the old caulk as possible. Wipe it off with a rag or rubbing alcohol.
- Apply the caulk circular the edge of the sink. It is very important that yous have a consequent and uniform bead. To practise this, don't elevator the tube from the time y'all start until yous finish. If you can't help information technology and elevator the tube, starting time the awarding about ¼ inch back from where you stopped to create an overlap.
- For uniformity, run your finger round the caulk bead and wipe off the excess caulk.
- Look for most 1 hour for the caulk to dry, though it could have up to a day to completely cure.
4. Supervene upon Faucet Cartridges and O-rings
If the source of the leak is worn out faucet O-rings and cartridges, you volition demand to replace the parts. If yous accept a Moen kitchen faucet you lot are lucky since they accept lifetime warranty, and all you take to exercise is call them and they volition transport you the parts for costless.
I have written a detailed guide on how to ready a leaking Moen kitchen faucet. Read it here. Replacing a faucet cartridge is usually an easy and straightforward task as the video below will demonstrate.
If you accept a pullout kitchen faucet, the hose running back to the underside of the kitchen tin develop a leak and mess your floor. In that case you will demand to replace the hose.
v. Fix the Garbage Disposal
The kitchen sink flange which connects the garbage disposal to the sink can be loose, or the plumber's putty nether its rim eroded causing leaks. The drain hose connection can also be loose, or the washer warped or worn out.
To ready a leaking garbage disposal y'all will first need to know exactly where it is leaking from. If the garbage disposal is leaking from the bottom, most of the fourth dimension it is as a effect of worn out internal seals. In that case the garbage disposal would need to be replaced.
I accept written a detailed post on how to replace a leaking garbage disposal. Read it here.

Source: https://plumbingsniper.com/leaking-kitchen-sink/
Posted by: bartlettimnion.blogspot.com
0 Response to "How To Repair A Leaking Sink Drain"
Post a Comment